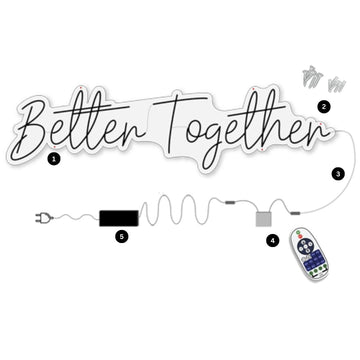
Installation facile prête à l'emploi

Comment monter ou accrocher votre enseigne ?

Bienvenue dans votre nouvelle enseigne au néon LED ! Pour garantir une installation sûre et efficace, veuillez suivre ces instructions étape par étape. Avant de commencer, pensez à manipuler votre panneau avec précaution pour éviter tout dommage.

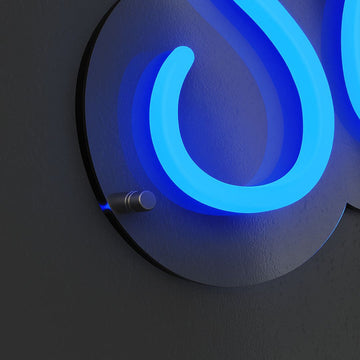
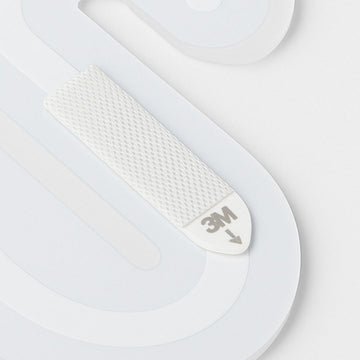
1. Wall Mounting Kit

Outils nécessaires:

  • Percer
  • Tournevis
  • Niveau
  • Crayon (pour marquer les positions de perçage)
  • Mètre ruban

Précautions de sécurité

  • Assurez-vous que l'alimentation est coupée pendant l'installation
  • Évitez de toucher directement la partie LED du panneau
  • Portez des gants de sécurité si nécessaire

Étape 1

Déballez votre panneau
  • Retirez délicatement le panneau de son emballage.
  • Vérifiez tout dommage qui aurait pu survenir pendant le transport.

Étape 2

Trouvez le bon emplacement
  • Décidez où vous souhaitez installer le panneau. Tenez compte de la visibilité et de la proximité d’une source d’alimentation.
  • Assurez-vous que la surface est propre, sèche et plane.

Étape 3

Marquage et perçage
  • Tenez le panneau contre le mur dans la position souhaitée.
  • Marquez le mur à travers les trous de montage du panneau.
  • Percez des trous là où vous avez marqué.

Étape 4

Insertion des chevilles murales dans les trous percés
  • Fixer et visser les entretoises au mur

Étape 5

Mettre des coussins des deux côtés du panneau

Placer les anneaux en silicone des deux côtés de la carte à travers les vis

Étape 6

Fixation des bouchons à vis
  • Fixez et serrez les bouchons à vis

Étape 7

Alimenter le signe
  • Connectez soigneusement le panneau au variateur et à l'alimentation électrique.
  • Assurez-vous que toutes les connexions sont sécurisées et ne sont pas tendues

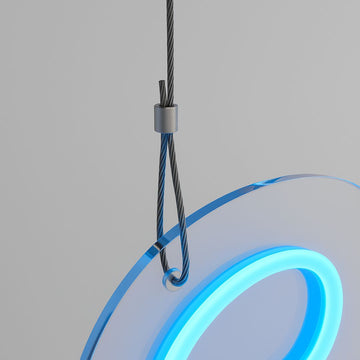
2. Suspension Kit

Safety precautions

  • Ensure power is off during installation
  • Avoid touching the LED part of the sign directly
  • Wear safety gloves if necessary

Step 1

Unbox your sign

  • Carefully remove the sign from its packaging.
  • Check for any damage that might have occurred during shipping.

Step 2

Measure and Mark
  • Determine where the sign will hang. Measure the distance between the suspension points on the sign and mark these points on the ceiling.

Step 3

Install Hooks
  • Screw the provided hooks or ceiling anchors into the marked points. Ensure they're firmly fixed and can bear the sign's weight.

Step 4

Attach Cables
  • Connect the suspension cables to the sign, adjusting their length as needed to achieve the desired hanging height.

Step 5

Hang the Sign

Carefully lift the sign and hook the suspension cables onto the ceiling hooks. Double-check the balance and security of the sign.

Step 6

Powering the sign
  • Carefully connect the sign to the dimmer and the power supply
  • Ensure all connections are secure and not strained
Final Adjustments
  • For both methods, it's crucial to make final adjustments to ensure the sign is level, securely attached, and positioned as desired. Once installed, connect your sign to a power source and enjoy the vibrant glow.
  • Both the Wall Mounting Kit and Suspension Kit offer distinct advantages, allowing for flexibility in how and where you display your LED neon sign. Choose the method that best fits your space and aesthetic preference.
Maintenance and Troubleshooting

Maintenance:

  • Regularly dust the sign with a soft, dry cloth.
  • If needed, gently clean with a damp cloth and mild soap. Avoid harsh chemicals.

Troubleshooting:

  • If the sign does not light up, check the power supply and connections.
  • In case of flickering or partial illumination, ensure all connections are tight and secure.